
|
Windows Technical Help |
|
|
Windows Technical Help |
To make the dns changes in Win9x or WinMe, first open dial-up networking. In Win9x, this can be found under My Computer, for WinMe, click on the start button and go to settings.
In the dial-up networking folder, click on your wcnet connectoid with the right mouse button. In the pop up box that appears, click on properties with the left button.
In Win95, click on the server types button In Win98, click on the server types tab In WinMe, click on the networking tab
Whichever version you are using, you will see a picture that looks something like this:
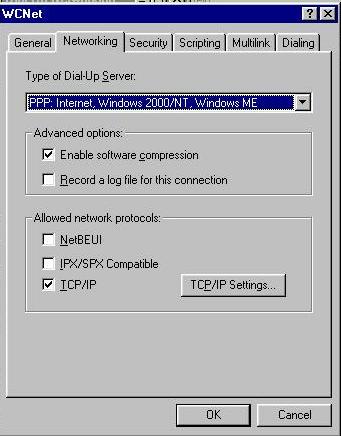
Click on the tcp/ip settings button. Make sure your settings match the ones in this picture:
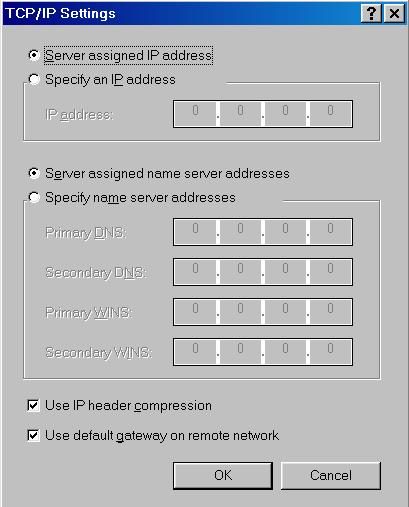
Click ok and ok again and then close dial up networking. Next we want to go to the control panel. Get to it by clicking on the start button and settings. In the control panel, we are looking for the network icon.
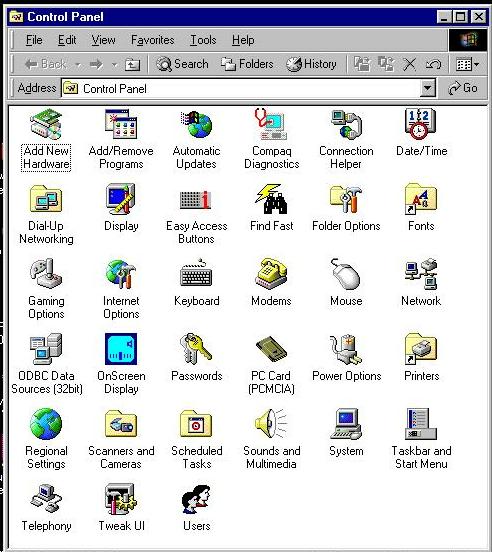
*Before continuing, make sure you have your Win9x or WinMe disk available. You may or may not need it but WCNet will not be responsible if you are asked for the disk and do not have it. Any errors that may occur will then be your responsibility. Double-click on the network icon to open it up. Click on tcp/ip to highlight it and click on properties. Make sure that you click on the tcp/ip that connects to the dial-up adapter if you have an ethernet card installed, as in the example. If you don't have an ethernet card, you should only have one tcp/ip.
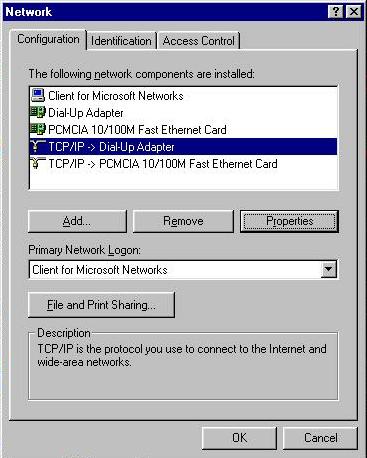
(In Win98, say okay to the prompt that comes up.) Click on the DNS Configuration tab. Make sure that your settings match the ones in the picture below (except that you should have your login name in place of mine under host).
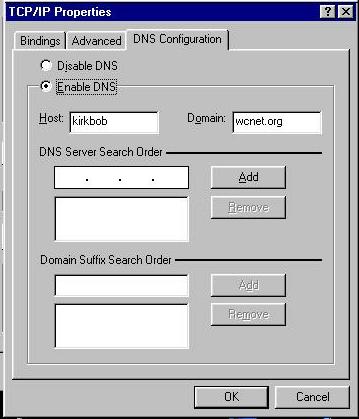
Click okay at the bottom. Click okay again. This is when your computer may want your disk, if so, insert it. Some files may be copied and, eventually, the computer will want to restart. Let it. Once it restarts, you'll be ready to surf!
If you are unable to surf after completing the above instructions, you may need to enter the dns numbers. To do this go back to the section marked with an asterick. Click on the DNS configuration tab again and then click in the box with the three dots. Type in 64.31.64.1 and click on the add button. Click in the box with the three dots again and type in 64.31.64.2 and click the add button again. When you are done, your setup should look like this:
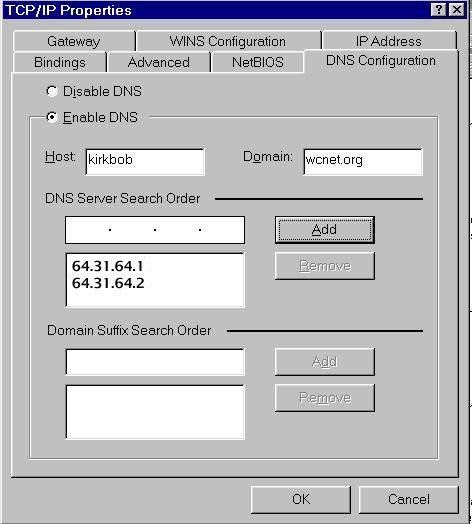
Click okay at the bottom. Click okay again. This is when your computer may want your disk, if so, insert it. Some files may be copied and, eventually, the computer will want to restart. Let it. Only add these numbers if you are unable to surf without them. They are server assigned. We are only adding this section because, for some reason, a few older versions of Windows do not work correctly with server assigned dns.
Back to the Help Desk Pages
Back to PC Technical Help
Please report problems with these pages to the Helpdesk pagemaster.
 E-mail US